

Why It Matters
MCP (Model Context Protocol) has become the standard way for integrating pre-made workflows into AI agents. By integrating the Bigdata.com REST API and cookbook REST modules with MCP, users can seamlessly incorporate advanced research workflows into their AI-driven investment analysis. While we provide a ready-to-use MCP search service that offers powerful similarity search capabilities across transcripts, news, filings, and uploaded documents, we also believe in the immense value of customization. Every organization has unique workflows, specific data requirements, and distinct analytical needs that can be best served through tailored MCP implementations.A Real-World Use Case
This cookbook demonstrates how to build your own MCP with three practical examples that showcase the power of customization:- Company Universe Manager - Register a list of Bigdata entity IDs (
company_ids) for targeted analysis - Thematic Screener - Screen companies against specific investment themes using REST search + OpenAI
- Concurrent Search - Execute multiple REST search queries simultaneously for comprehensive data retrieval

Prerequisites
To run the run the custom MCP, you can choose between two options:-
💻 GitHub cookbook
- Use this if you prefer working locally or in a custom environment.
- Follow the setup and execution instructions in the
README.md. - Copy
.env.exampleto.envand set:BIGDATA_API_KEY— your Bigdata.com API keyOPENAI_API_KEY— your OpenAI API key (required for theme taxonomy generation)- See the cookbook
README.mdfor full setup instructions.
- 🐳 Docker Installation - Docker installation provides an alternative setup method with containerized deployment, simplifying the environment configuration for those preferring Docker-based solutions.
Setup and Imports
Below is the Python code required for setting up our environment and importing necessary libraries. We will take advantage of theuv tool to run our script in an isolated environment, using their script dependencies.
Here the main configuration is changing the LLM_MODEL variable to select the OpenAI model for the thematic screener (default: gpt-5.6-luna). Luna models omit temperature and top_p — see _chat_completion_kwargs() in the script.
The second configuration is the TRANSPORT variable, which can be set to either "sse" (Server-Sent Events) or "streamable-http". The "sse" option is the only one supported by ChatGPT’s developer mode, while "streamable-http" offers better compatibility with various clients, including Claude and Cursor.
build_your_mcp.py
Configure and start the MCP server
Next, we will configure and start the MCP server. The server hosts three tools: company universe registration, REST-based thematic screening, and concurrent Bigdata.com search. How to run and configure the screener is explained in more detail in the Thematic Screener documentation.build_your_mcp.py
ChatGPT Integration
Connecting to the MCP server from ChatGPT
Custom MCP integration only works with ChatGPT Plus or Pro subscriptions in developer mode. Also, ChatGPT requires MCP servers to be accessible over the internet, so make sure your server is publicly accessible.
- Enable
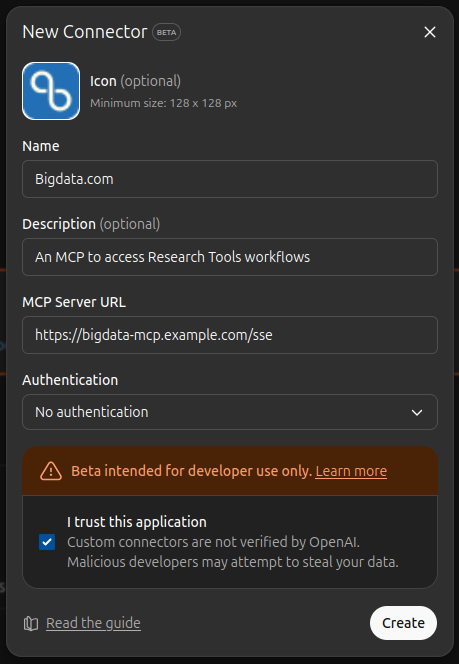
Settings > Connectors > Advanced settings > Developer mode. - Now, create a connector in
Settings > Connectors > Createand fill the details. Remember the MCP must use thessetransport.
Generating a Dynamic Dashboard
On the main ChatGPT interface, you can now prompt your agent to generate a dashboard with data from the premium sources available in Bigdata.com. First, enable developer mode and thinking mode in the prompt and select the source we have created before.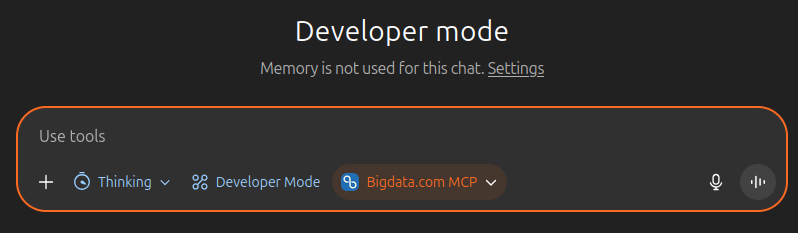
You may need to approve the agent’s access to the necessary tools and data sources.
Showcase of the generated report
Example Outputs
Chat Conversation
Conversation on developer mode with ChatGPT 5 Thinking.
Generated Dashboard
Dashboard generated by ChatGPT 5 Thinking.
Claude Desktop Integration
Connecting to the MCP server from Claude Desktop
Make sure your local MCP server is running on
http://localhost:8000 before configuring Claude Desktop.Node.js must be installed on your operating system for the MCP integration to work with Claude Desktop.Windows users: Install Node.js in a folder with a name that does not contain spaces. By default, the installation wizard will install it in C:\Program Files\nodejs\npx.cmd, which includes a space in the path. Instead, create a folder without a space in the name and install it there, for instance, in C:\program_files\Developer and then on Edit Config to open the configuration file claude_desktop_config.json.
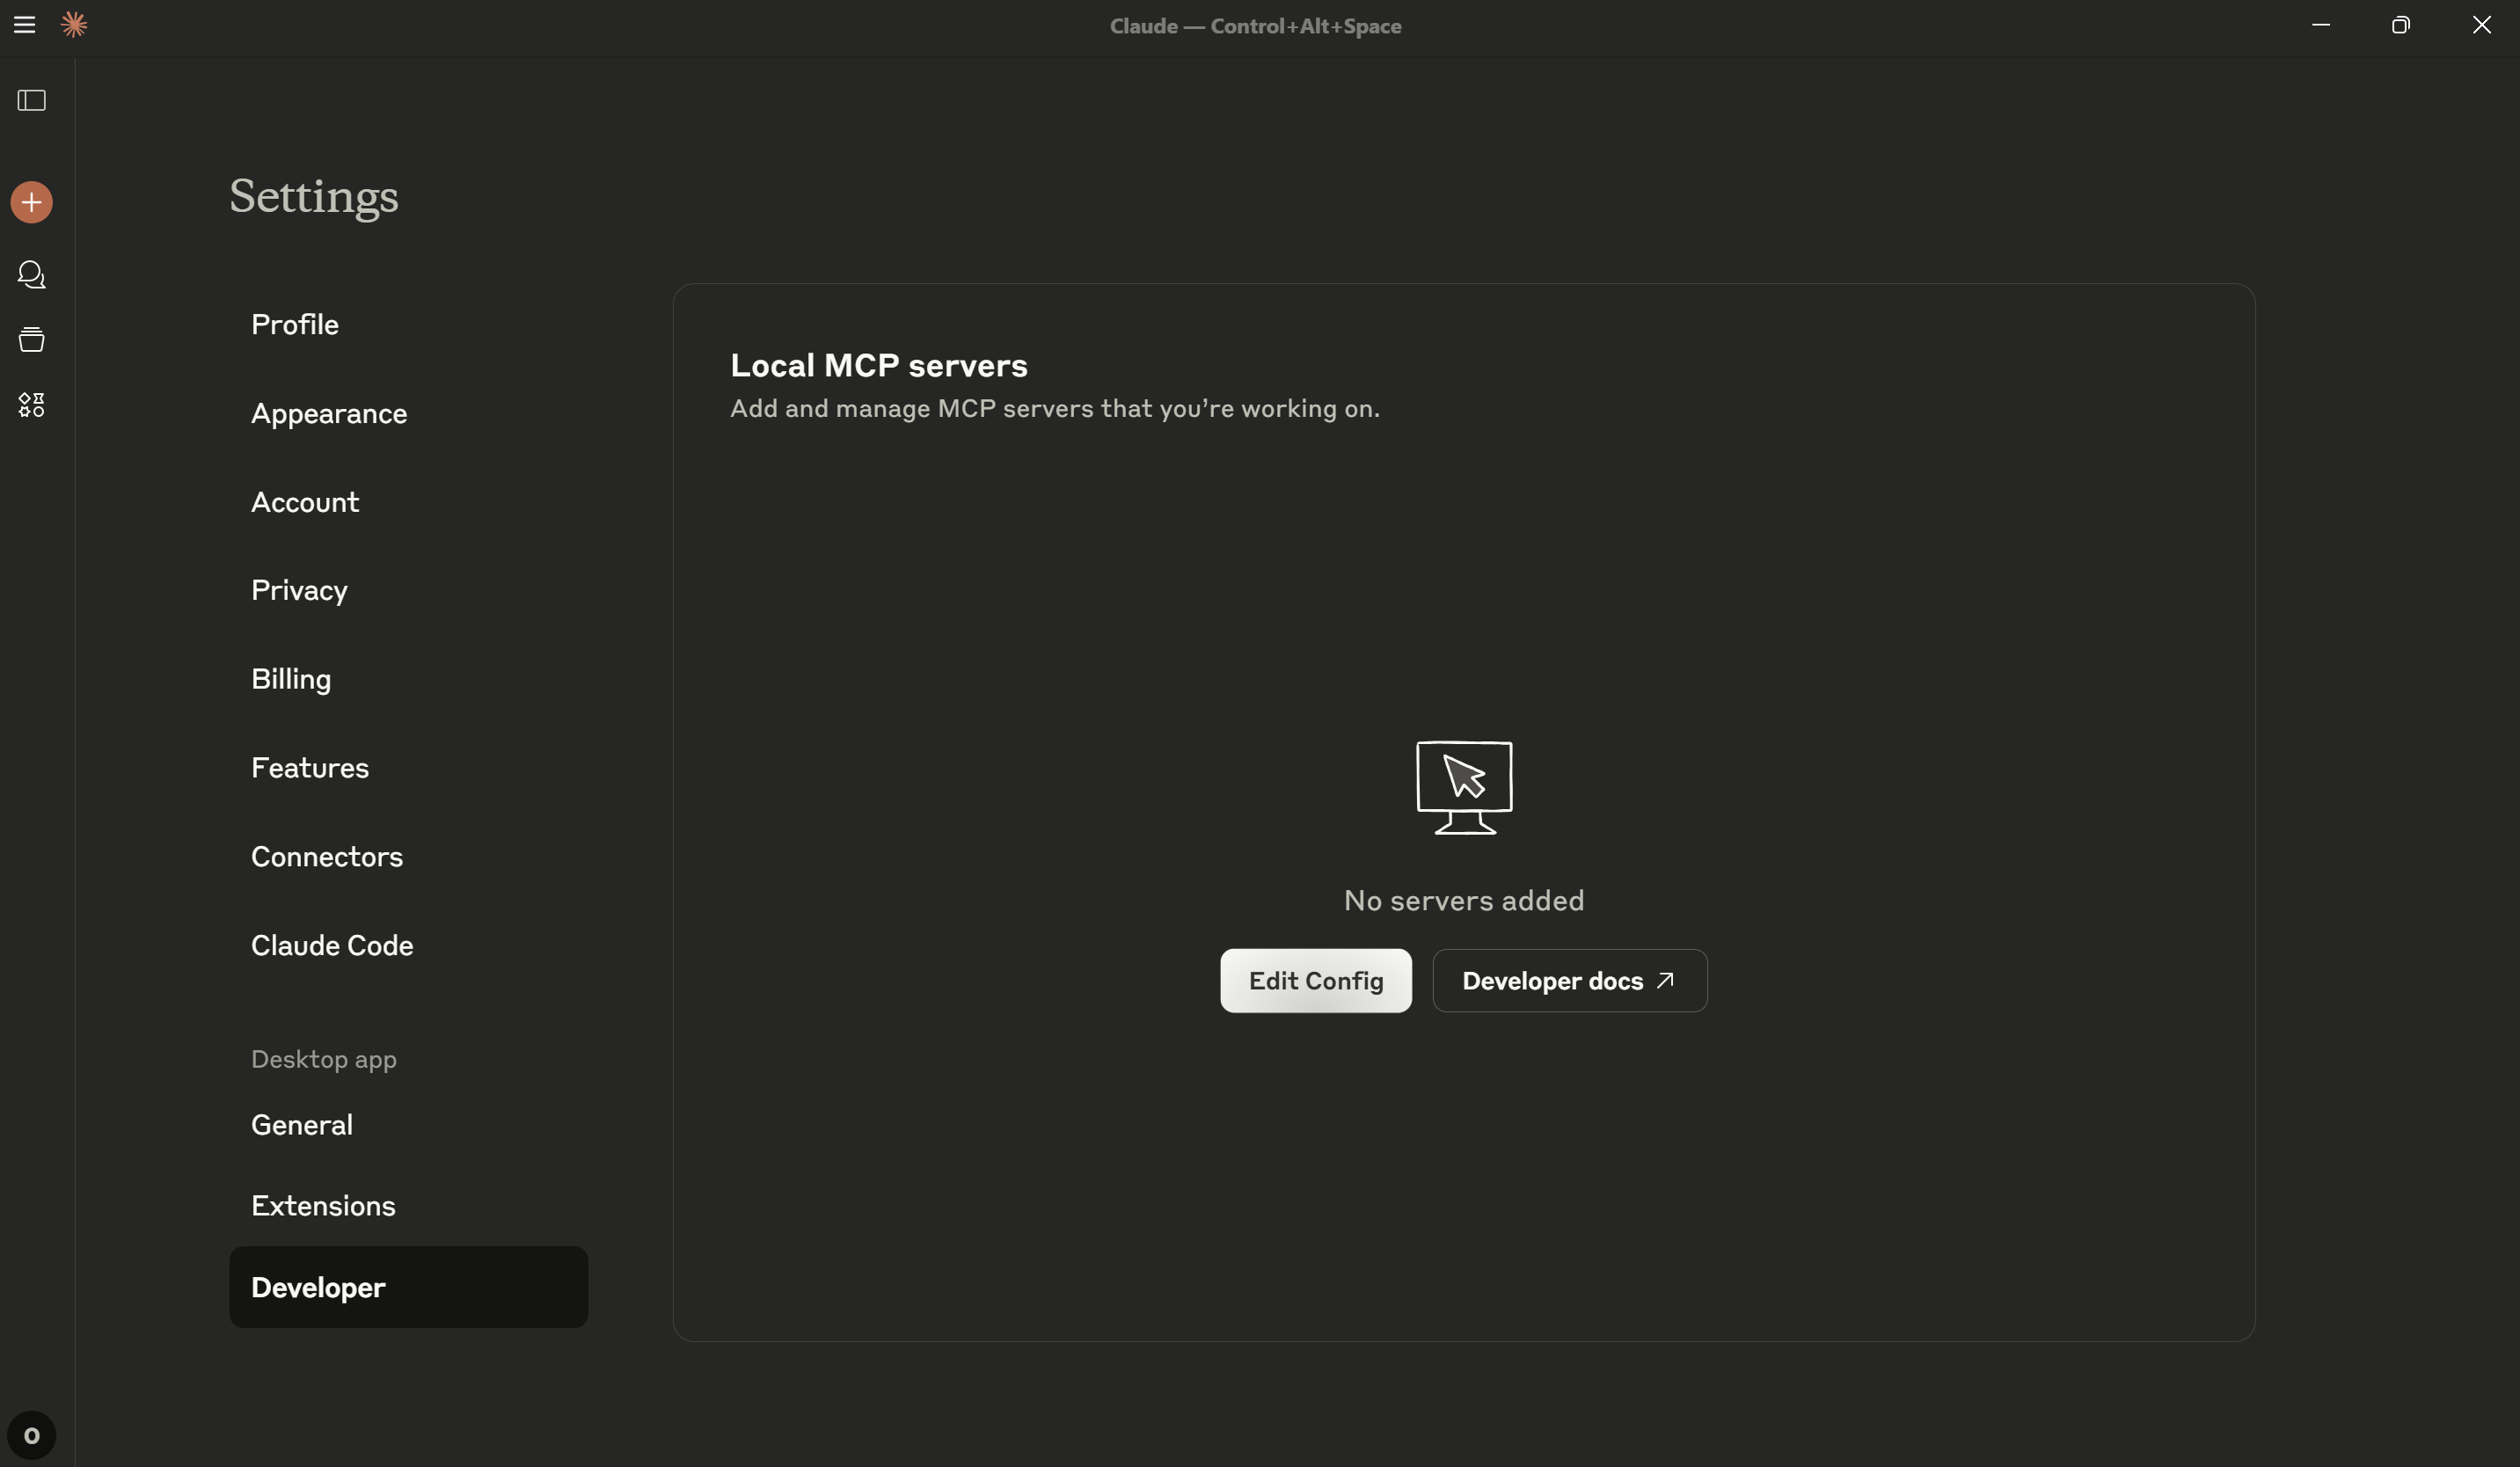
Settings to see the running custom MCP tools.
You may need to approve Claude’s access to the MCP tools when first using them.
Generating Claude Artifacts
Now that the MCP server is running and connected to Claude Desktop, you can leverage the custom tools to generate interactive Claude Artifacts. These artifacts can include dynamic dashboards, network diagrams, and comprehensive analysis reports. You can prompt Claude to use the available tools for complex workflows. Here are examples of the types of interactive artifacts you can generate:Example 1: Market Analysis Dashboard
Visa Fees Analysis Dashboard
Example 2: Conflict Analysis
Ukraine Conflict Analysis Dashboard
Example 3: Network Analysis
View Full Dashboard
Cursor Integration
Connecting to the MCP server from Cursor
In Cursor, go toFile > Preferences > Cursor Preferences > MCP > New MCP Server and add the following configuration:

Generating Thematic Screening Reports
Now that the MCP server is running and connected to Cursor, let’s prompt our agent to generate a thematic screening report and write it as a markdown file. First, register a company universe by Bigdata entity IDs. Then screen those companies for a specific theme and fiscal year:You may need to approve the agent’s access to the necessary tools and data sources.
Showcase of the generated report
Example Generated Report
Here’s a sample of the markdown report that Cursor can generate:Next Generation Defense — 2024 Company Screening
- Company IDs: resolved Bigdata entity IDs (not a platform watchlist)
- Fiscal Year: 2024
- Theme: Next Generation Defense
Summary
Below are the screening results for the requested company universe, sorted by Composite Score (descending). Higher Composite Scores indicate broader and/or deeper alignment to the theme across tracked capability areas.Results
No detected signals (FY2024)
- 3M Co.
- IBM Corp.
Notes
- The results reflect signals mapped to Next Generation Defense capability areas for FY2024, aggregated into a Composite Score per company.
- Companies with no detected FY2024 signals are listed separately above.